
Zoho CRM

Prerequisites
Before you get started, ensure you have:
A Mailercloud account
Zoho CRM account
The Mailercloud List ID where contacts will be added.
Integration Guide: Zoho CRM with Mailercloud
Step 1: Login
Go to the Zoho CRM login page and enter your account credentials.
Step 2: Navigate to Contacts
Once logged in, click on the "Contacts" tab to access your contacts.
Step 3: Access Settings
In the top-right corner of the screen, click on the gear icon to access the settings menu.
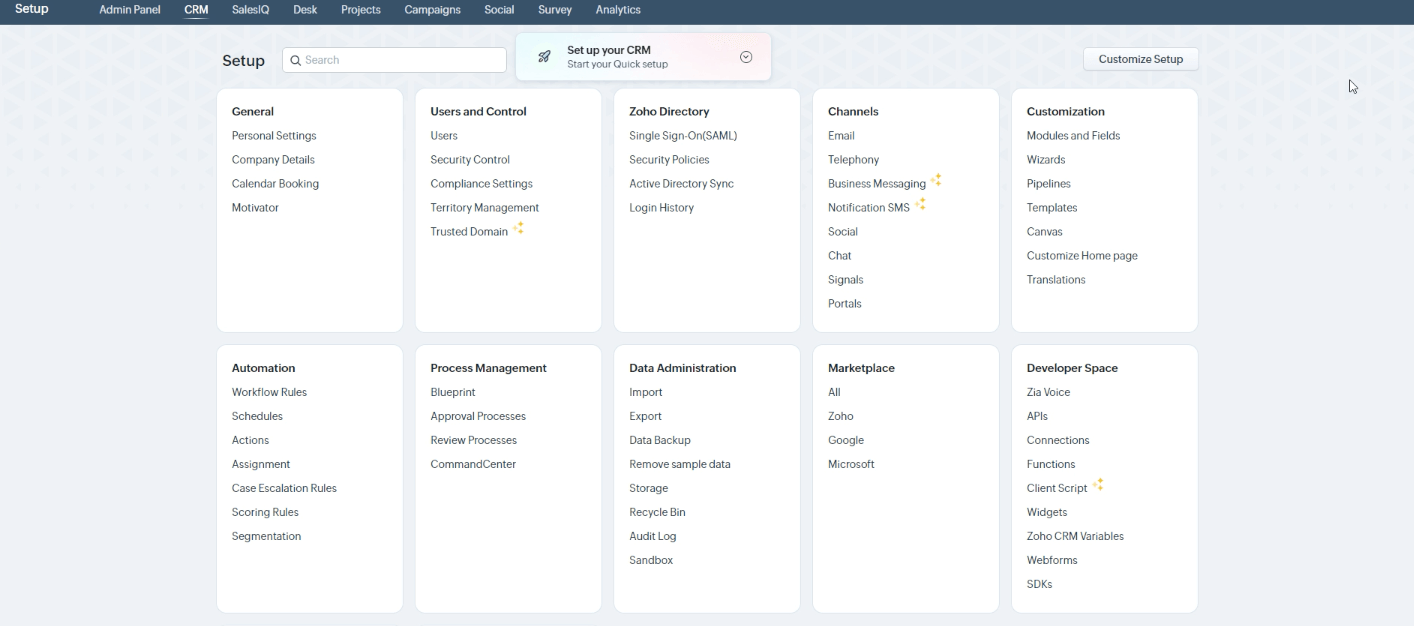
Step 4: Set Up Workflow Rules
Under the "Automation" section, click on "Workflow Rules" to set up your rules.
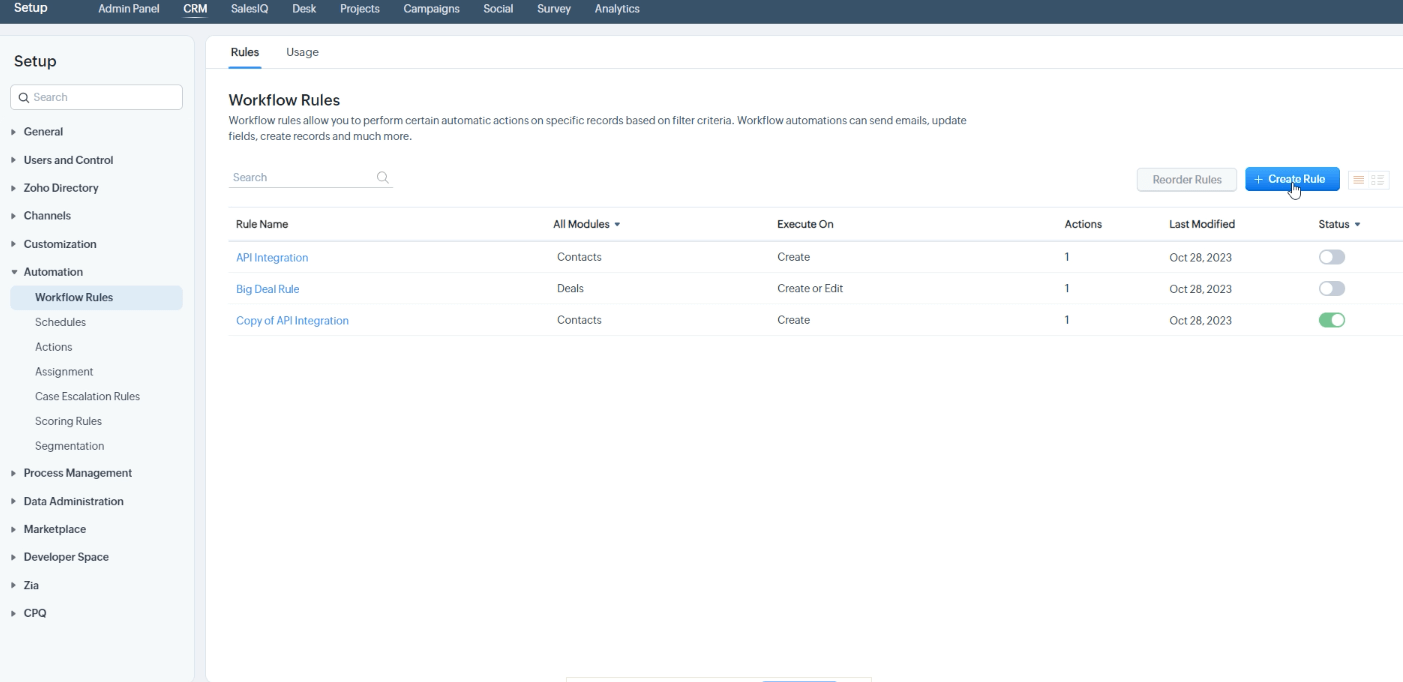
Step 5: Create a New Rule
Click on the "Create Rule" button to create a new rule.
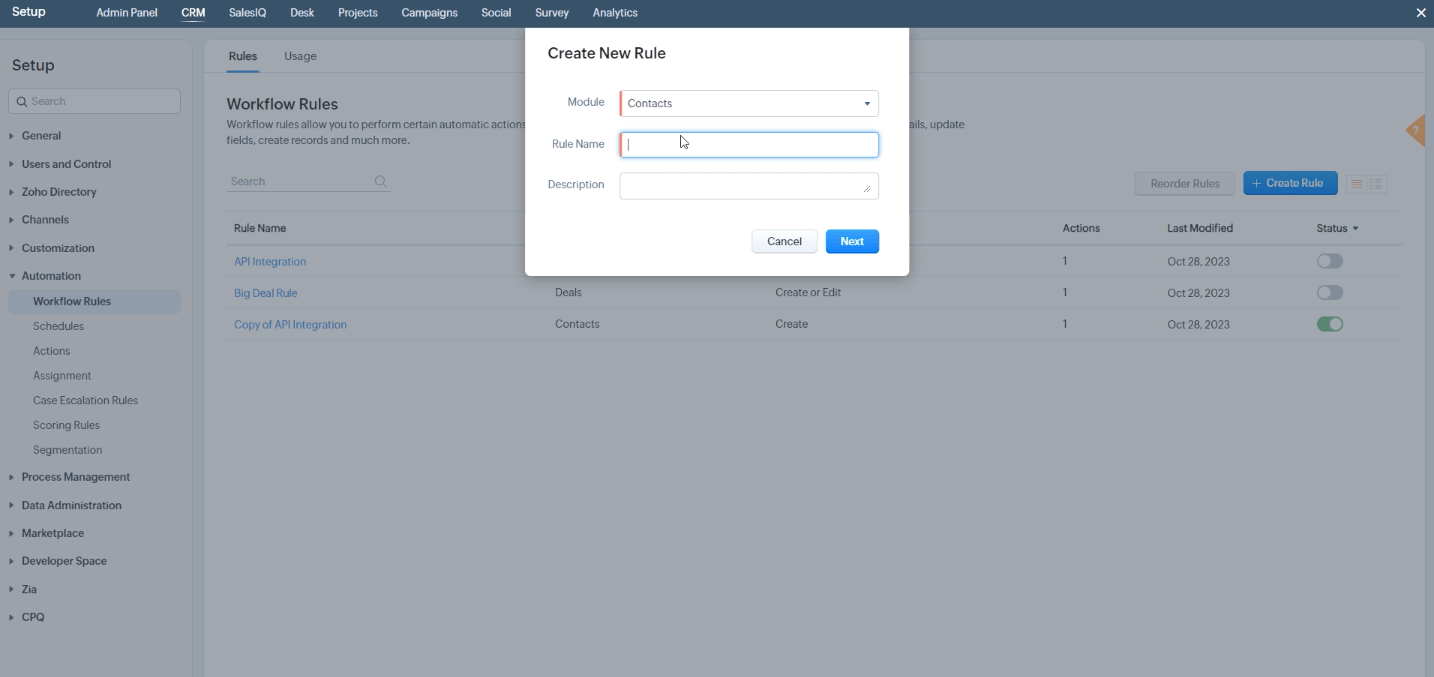
Step 6: Configure Rule
On the "Create New Rule" screen, select "Contacts" from the dropdown menu in the "Module" section. Give the rule a name and click "Next".
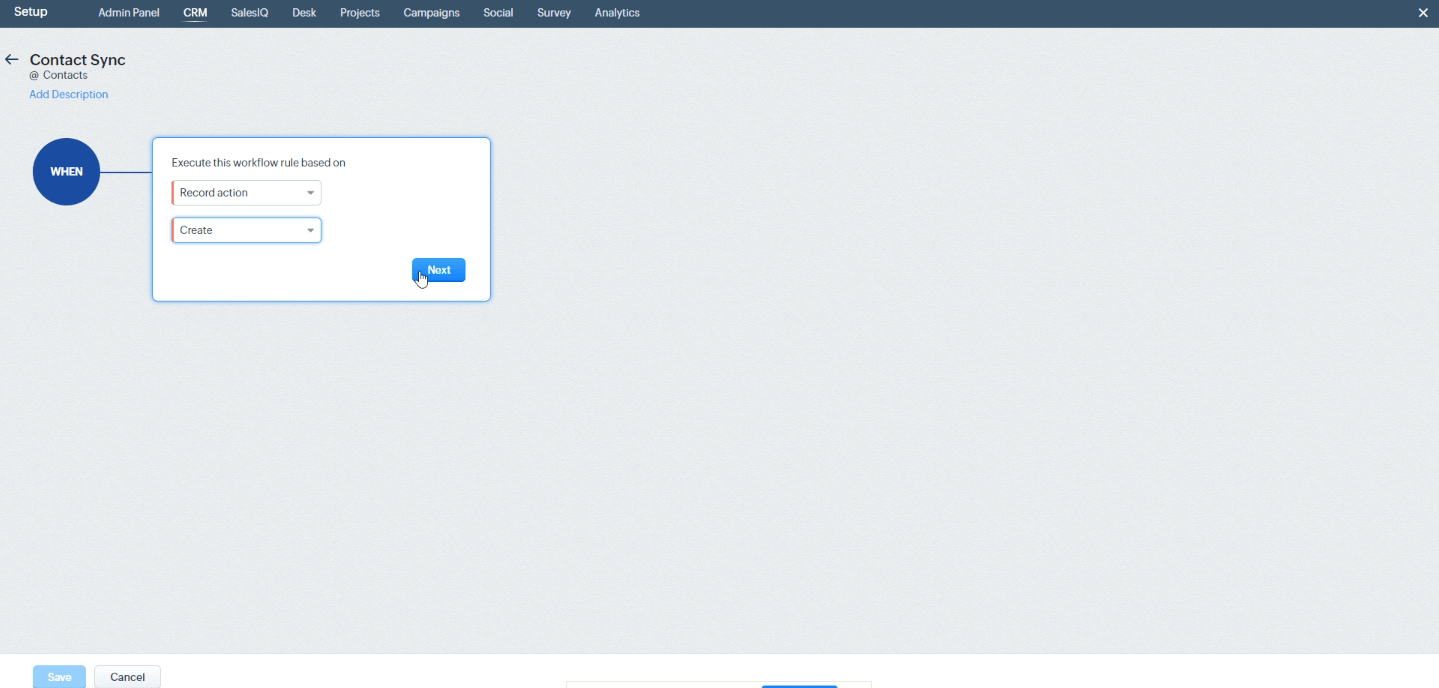
Step 7: Configure Contact Sync
On the "Contact Sync" screen, select "Record action" for "Execute the workflow rule based". Choose "Create" and click "Next".
Step 8: Set Rule Condition
On the "Condition 1" screen, select "All Contacts" as the option to apply the rules to and click "Next".
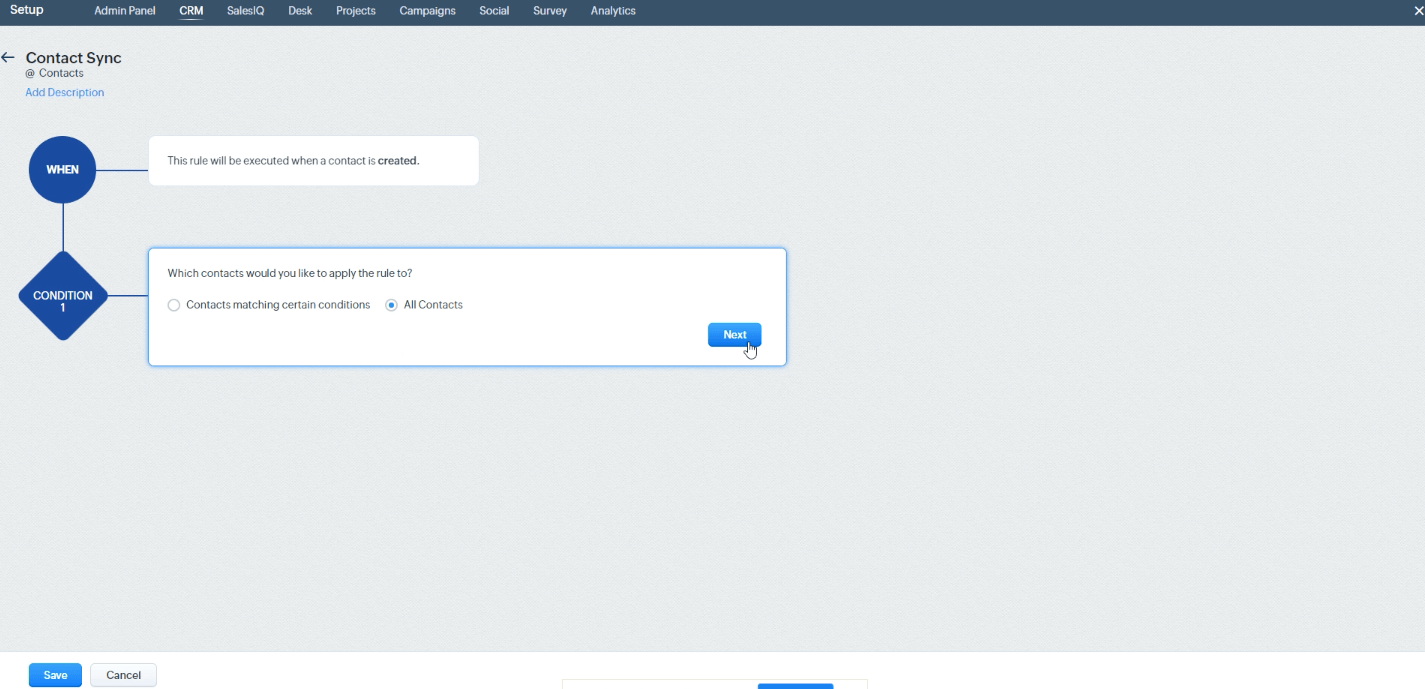
Step 9: Configure Instant Action
On the "Instant Action" screen, select "Function" from the dropdown menu and click "+New Function".
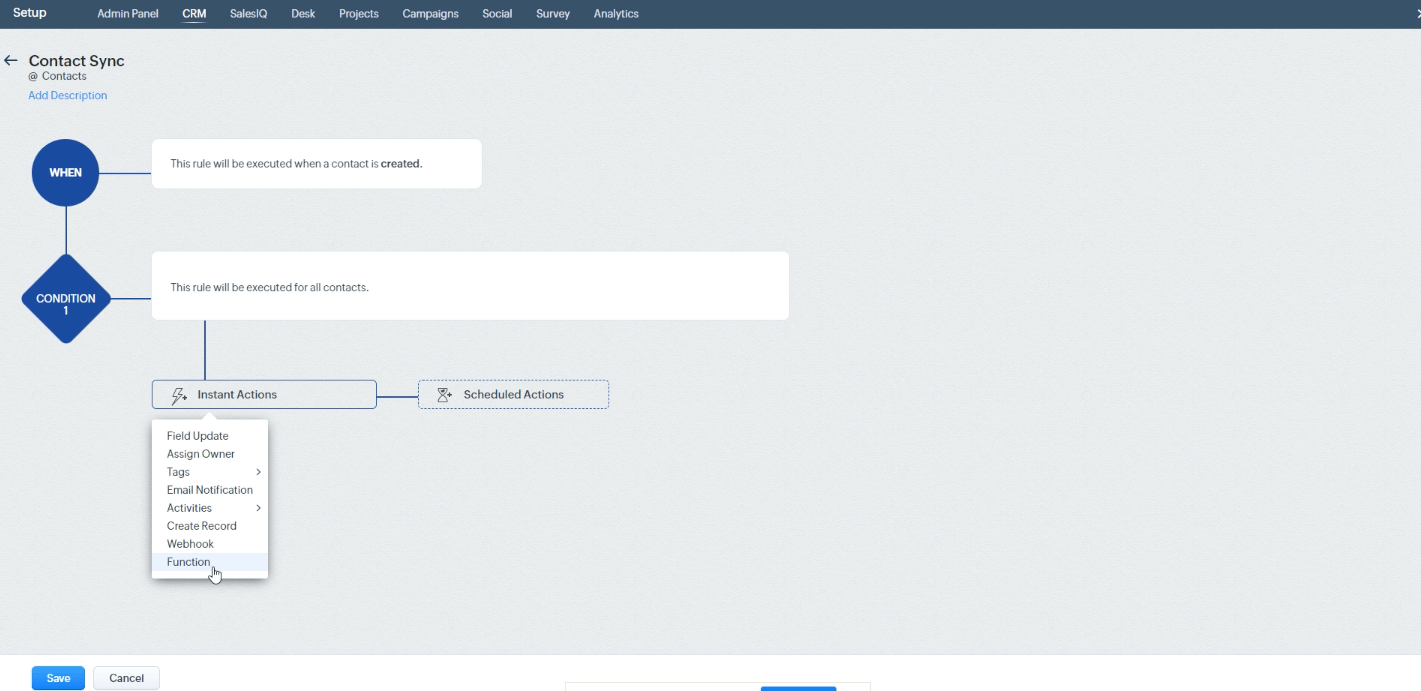
Step 10: Configure Function and Define Actions
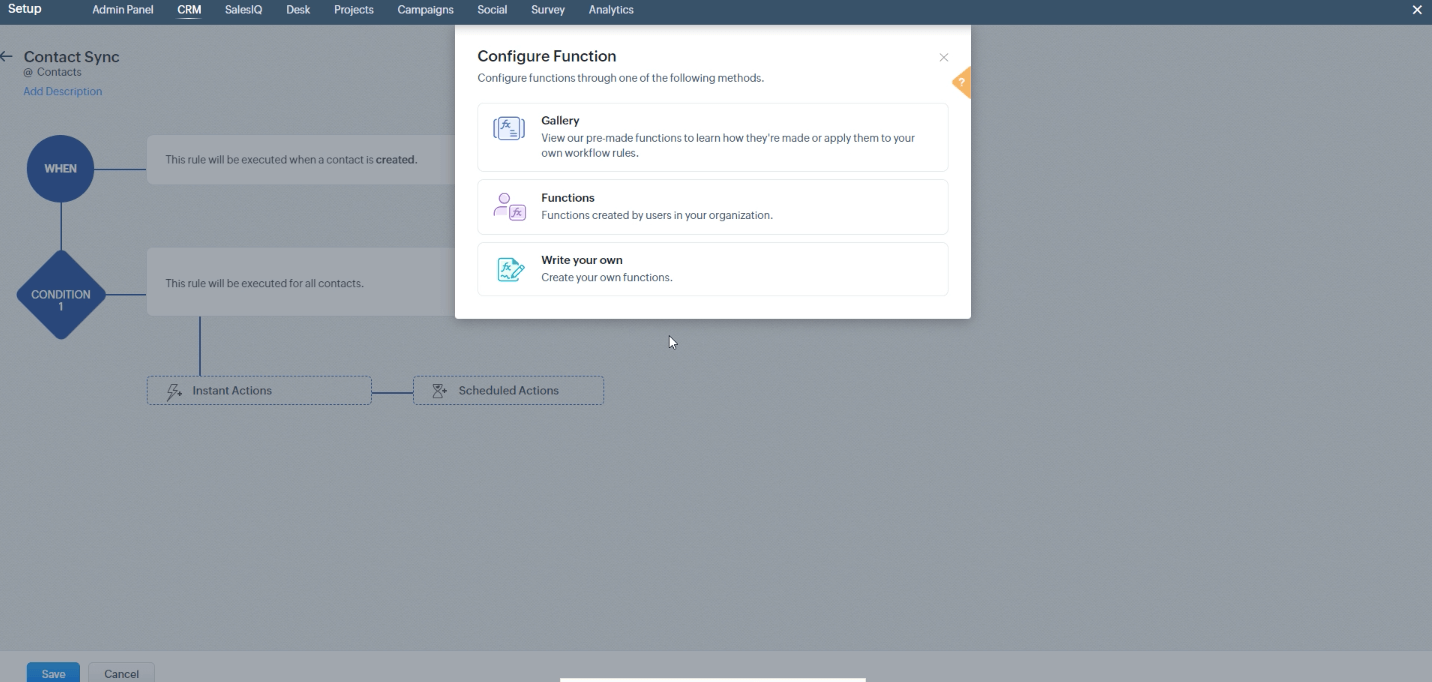
In the "Configure Function" screen, follow these steps to set up the function and define the desired actions
- Select the "Write your own" option.
- Provide a function name and display name in the provided form.
- Click on "Create" to create the function.
Step 11: Edit Arguments
After clicking on the "Configure Function" button, you will be directed to the description screen. In this section, you need to define the functions to create or update contacts. Click on "Edit Arguments" to proceed.
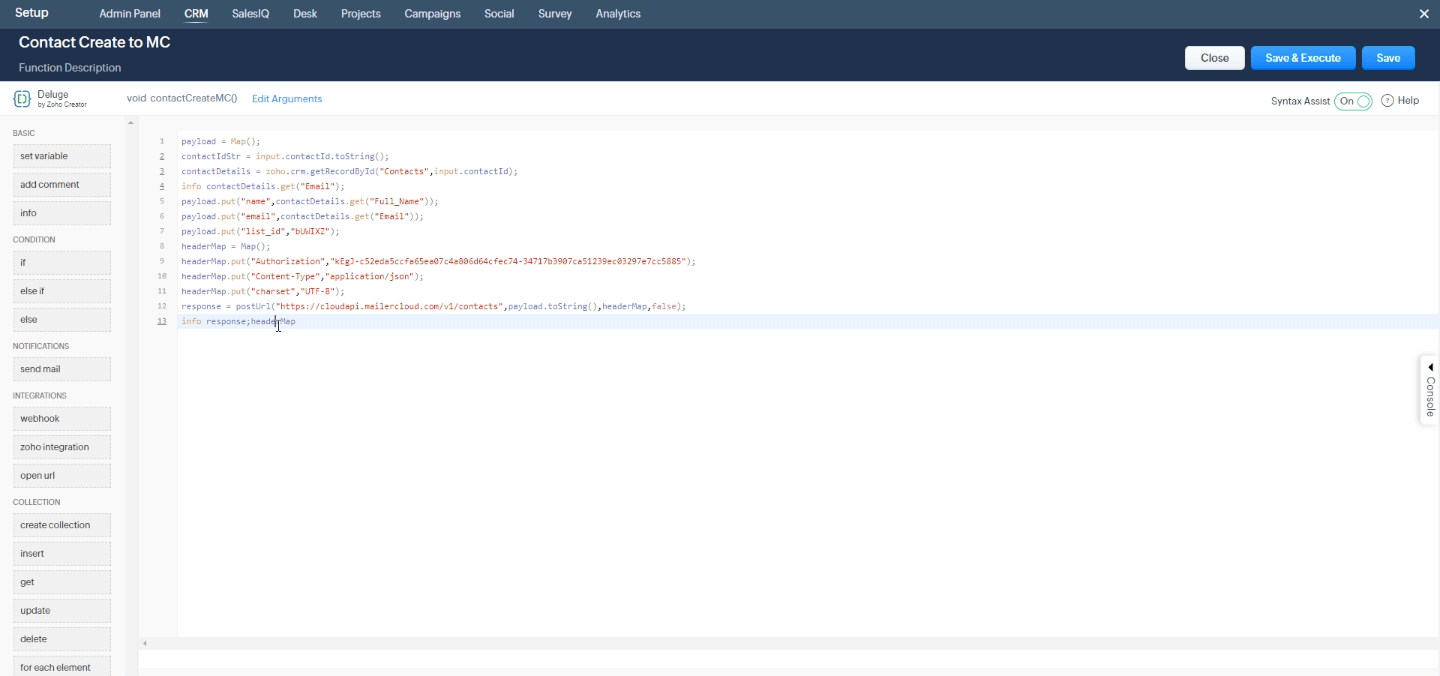
To integrate this function into your platforms, you can copy the code snippet below and paste it into your development environment or code editor
Zoho Integration
payload = Map();
contactIdStr = input.contactId.toString();
contactDetails = zoho.crm.getRecordById("Contacts",input.contactId);
info contactDetails;
payload.put("name",contactDetails.get("Full_Name"));
payload.put("email",contactDetails.get("Email"));
payload.put("list_id","bUWIXZ");
headerMap = Map();
headerMap.put("Authorization","xxxxxxxxxxxxxxxxxxxxxxxxxxxxxxxxxxxxxxx");
headerMap.put("Content-Type","application/json");
headerMap.put("charset","UTF-8");
response = postUrl("https://cloudapi.mailercloud.com/v1/contacts",payload.toString(),headerMap,false);
info response;
Step 12: Map Arguments
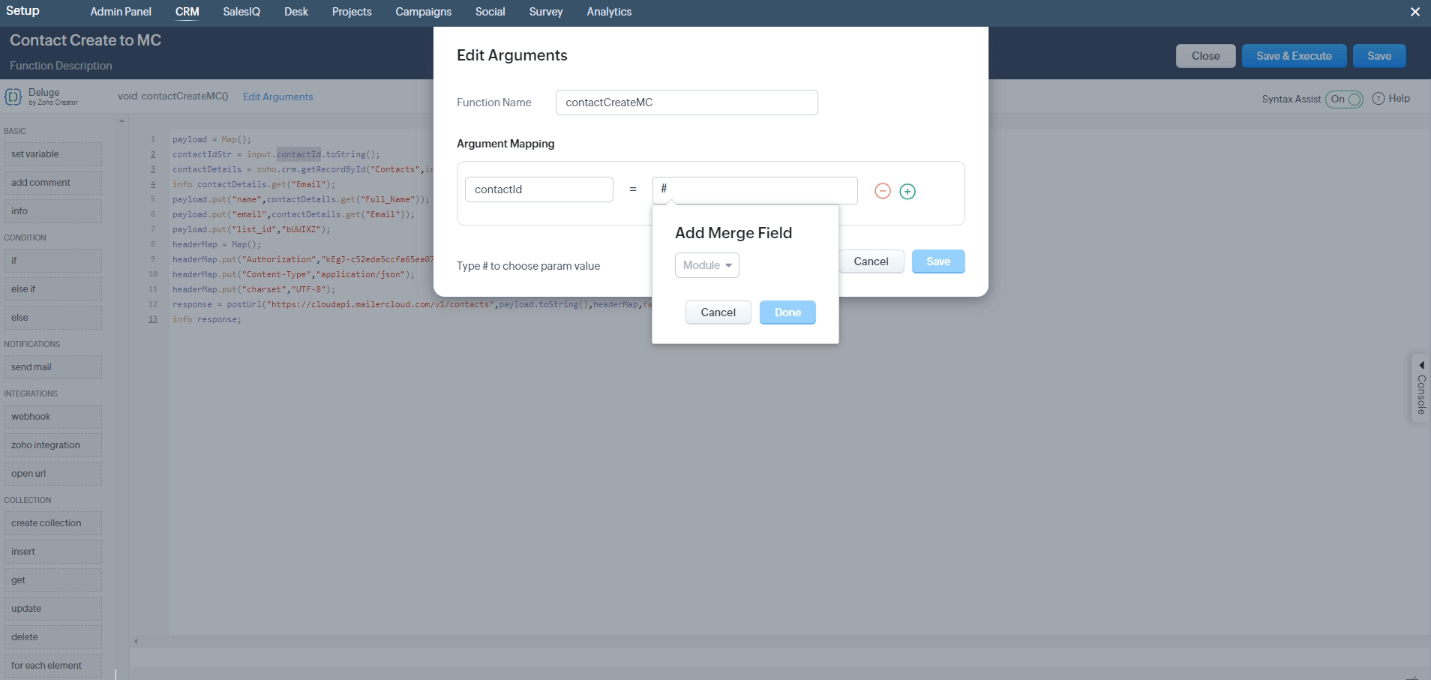
In the pop-up screen under argument mapping, give "key" as contactId and in the "param value" field, click "#" to open a dropdown. Select "Contact" and then "Contact ID". Click "Save and Execute".
Step 13: Test Function Execution and Integration
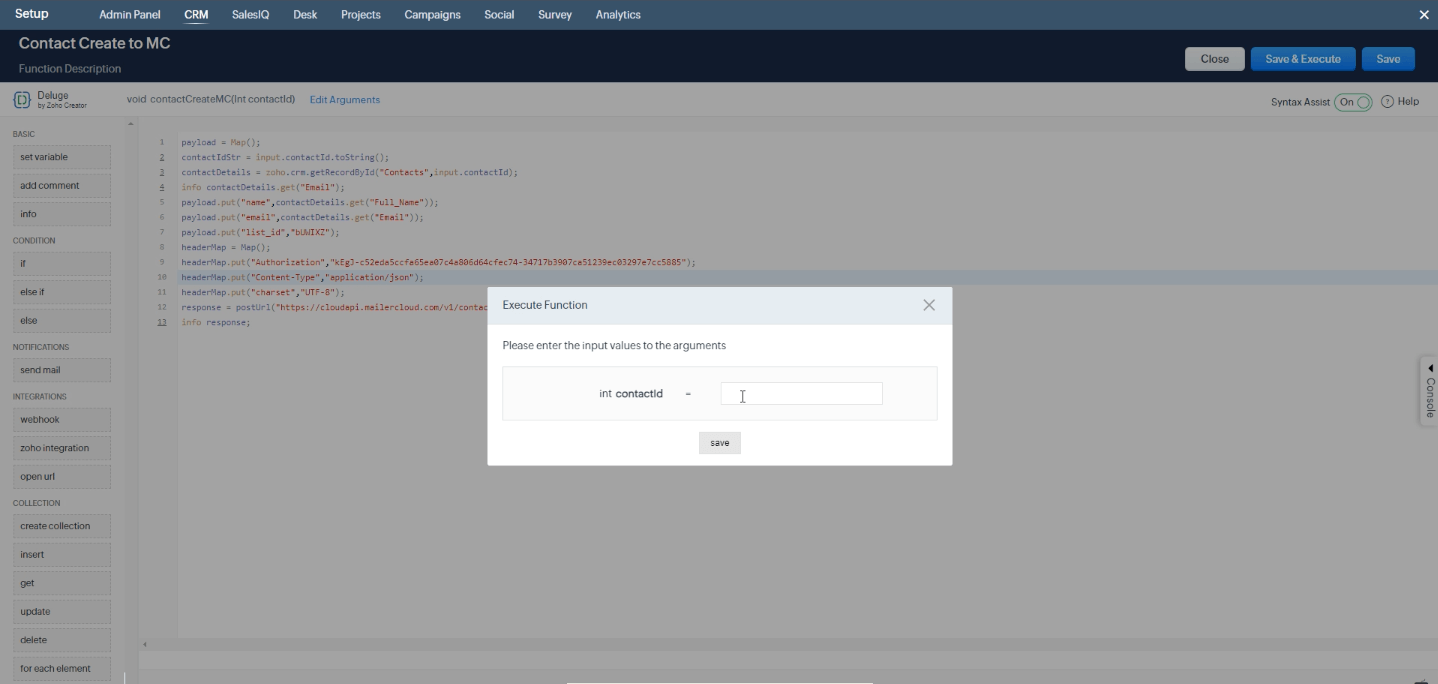
In the "execute function" section, follow these steps to test the function and ensure its proper execution and integration with Mailercloud:
- Obtain a contact ID from Zoho.
- Provide the obtained contact ID in the designated field of the execute function section.
- Execute the function.
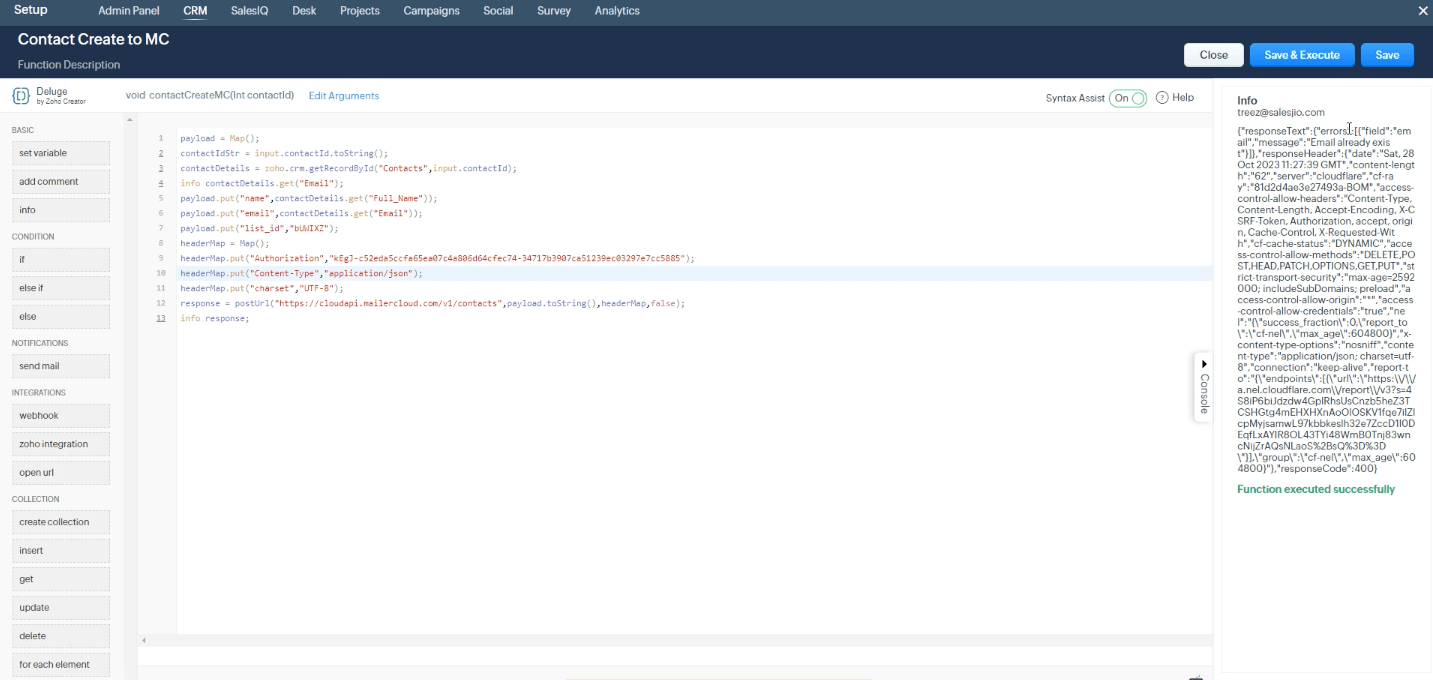
- Verify if the function executed successfully by checking for the appearance of an info message stating "Function executed successfully."
- Confirm that the contact from Zoho has been automatically added to Mailercloud.
Step 14: Save the Rule
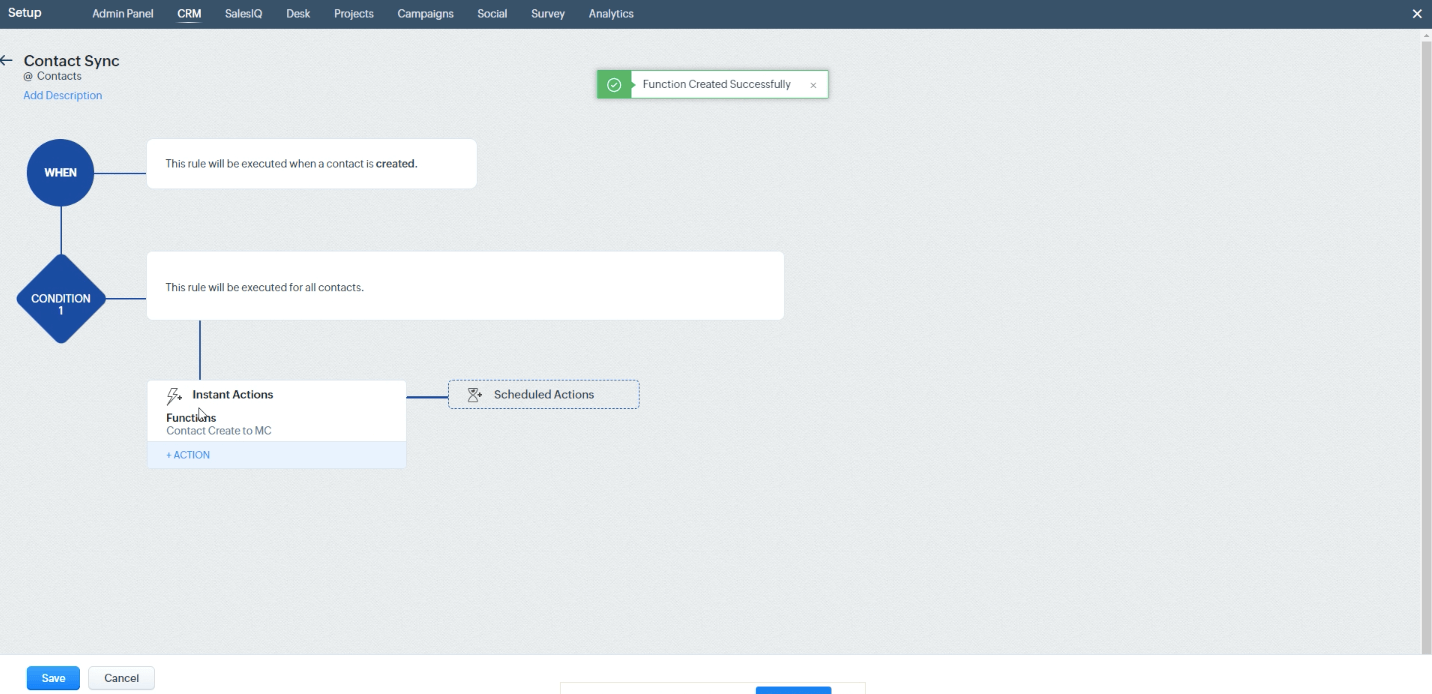
Once you have tested the function and verified its proper execution and integration, save the rule to finalize the process
Step 15: Verify Syncing
Go back to the workflow rules page, where you should see the recently created rule. Check if contacts added in Zoho CRM are synchronizing with your Mailercloud account with the specified list ID by adding a new contact in your Zoho account.
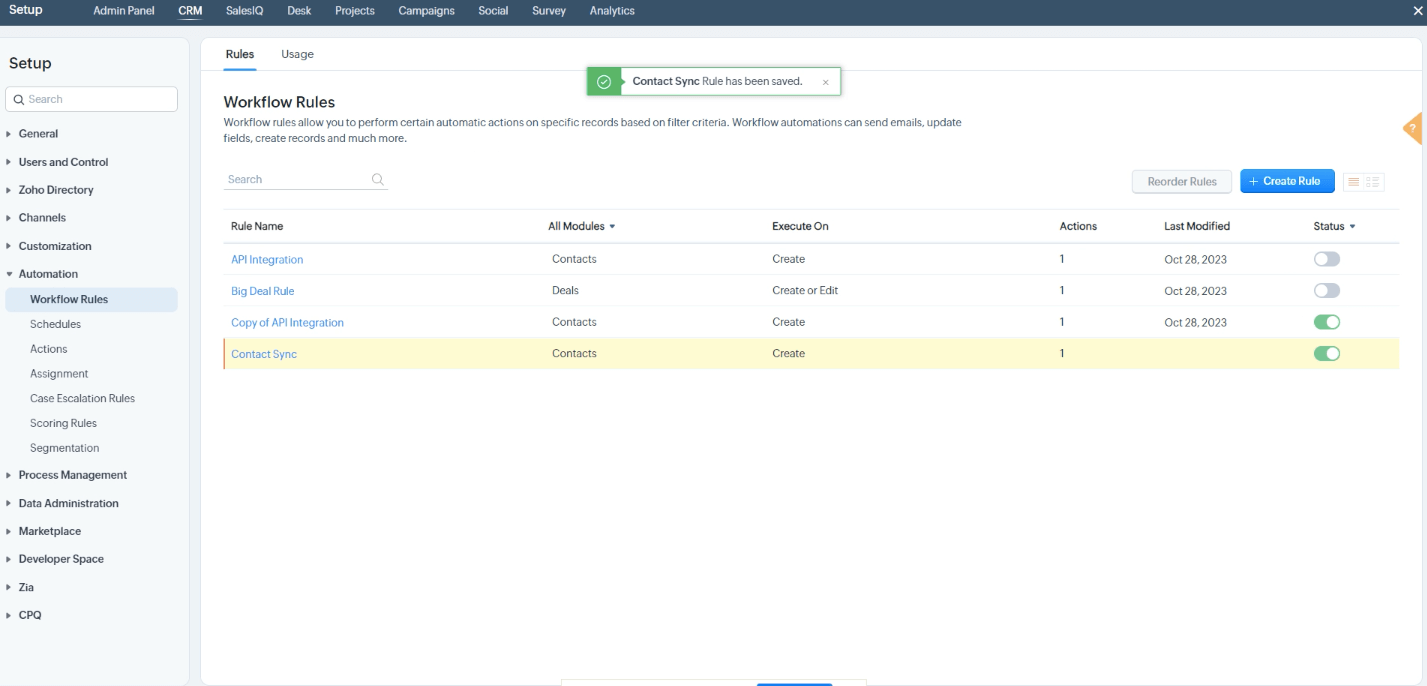
Following these steps will help you integrate Zoho CRM with Mailercloud and ensure that your contacts are seamlessly transferred between the two platforms